Create an automation with an If / Else condition
Create an automation with an If / Else condition.
An If / Else condition can help you narrow down the target audience of your automation. By adding your criteria, you can automatically segment your contacts and send campaigns to your intended audience.
To create an automation with an If / Else condition:
Click Add flow step
 below any part of your workflow where you want to add a Filter (If condition/Else) step.
In the Select action dialog, click Conditional/Control steps.
Click
 next to the Filter (If condition/Else) step.
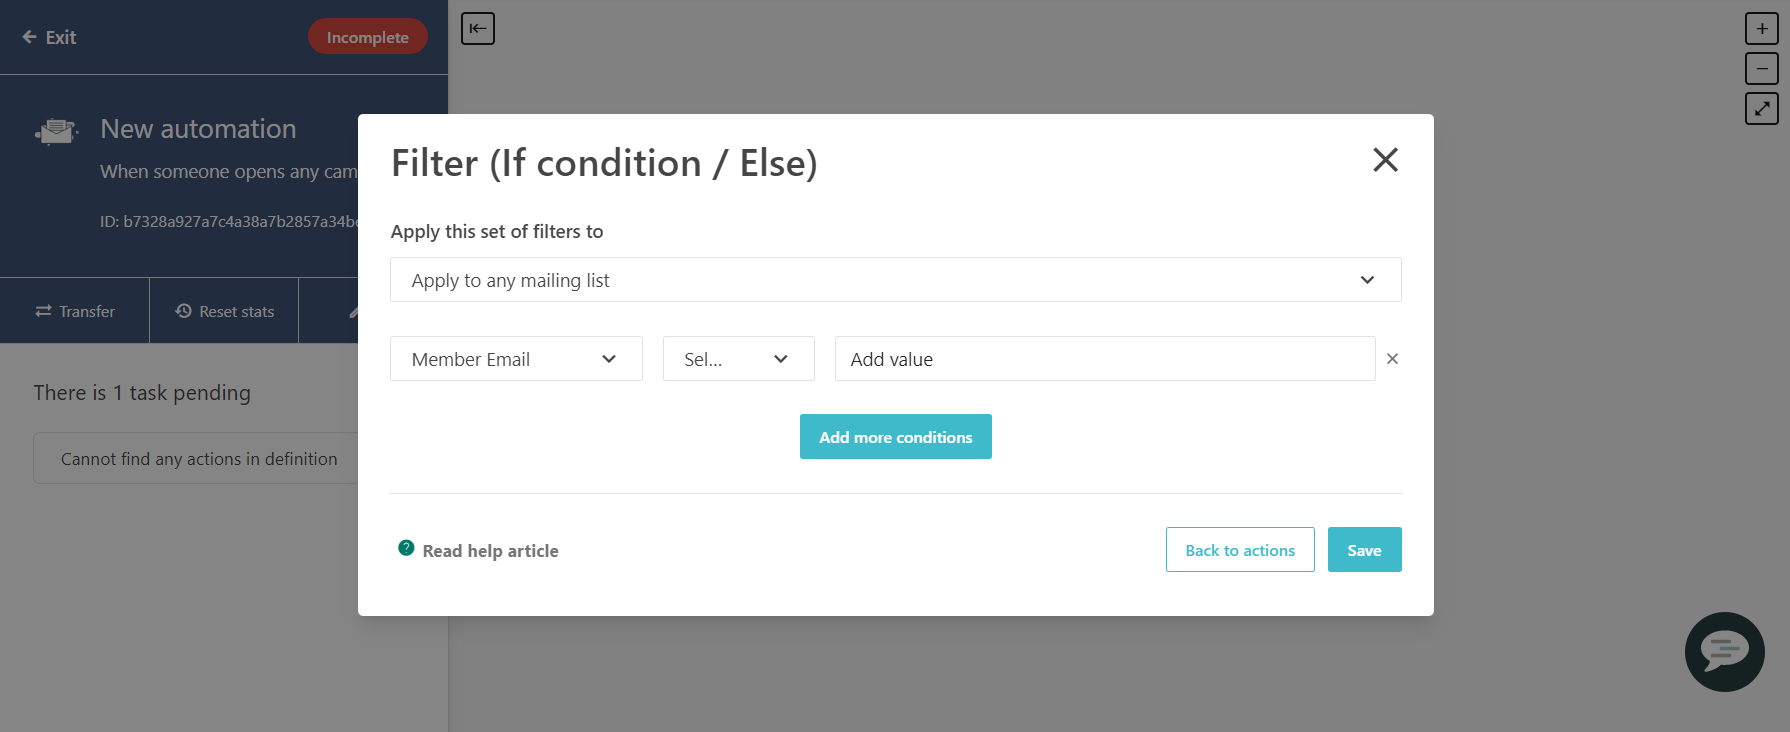
In the Filter (If condition/Else) dialog, click the Apply this set of filters to drop-down menu and select the email list that you want use.
Click Add condition and define the filter condition using the three drop-down menus:

First drop-down menu - click to select the criterion that you want to use to narrow down your target audience, for example, Member Name, Member Email, Date Added, Opened any campaign, Link clicked, and so on. You can also enter keywords to narrow down the list.
Second drop-down menu - click to select what operator to apply to your selected criterion. For example, is, is not, is before, is after, contains, does not contain, and so on.
Third drop-down menu - specify the value that should be fulfilled based on your criterion and operator. The available options available depend on what you selected from the first and second drop-down menus. It can be a text field, a drop-down list, date options, or time intervals.
Note
You can add more than one value in a text field to say that, for example, the Member Name is Tom OR Mary.
To add more conditions to your filter, click Add more conditions.
Click Save.