Use segments to create targeted campaigns
Filter your email list to provide subscribers with the information they are interested in.
Moosend lets you add segments in your email lists to send targeted campaigns to a specific audience. You can create segments of your lists by defining your audience based on information that you have already gathered in the form of custom fields and user activity collected from your previous campaigns. For example, whether members of your list have opened a campaign, or how many and which clicks they have made. Segments let you filter your email list and provide your subscribers with exactly the information they are interested in.
Add a segment
To add a segment:
On the menu bar, click Audience > Segments.
In the top right corner, click New > Segment.
In the Choose email list dialog, select the email list where you want to add a segment and click Start.
Click Create custom segment.
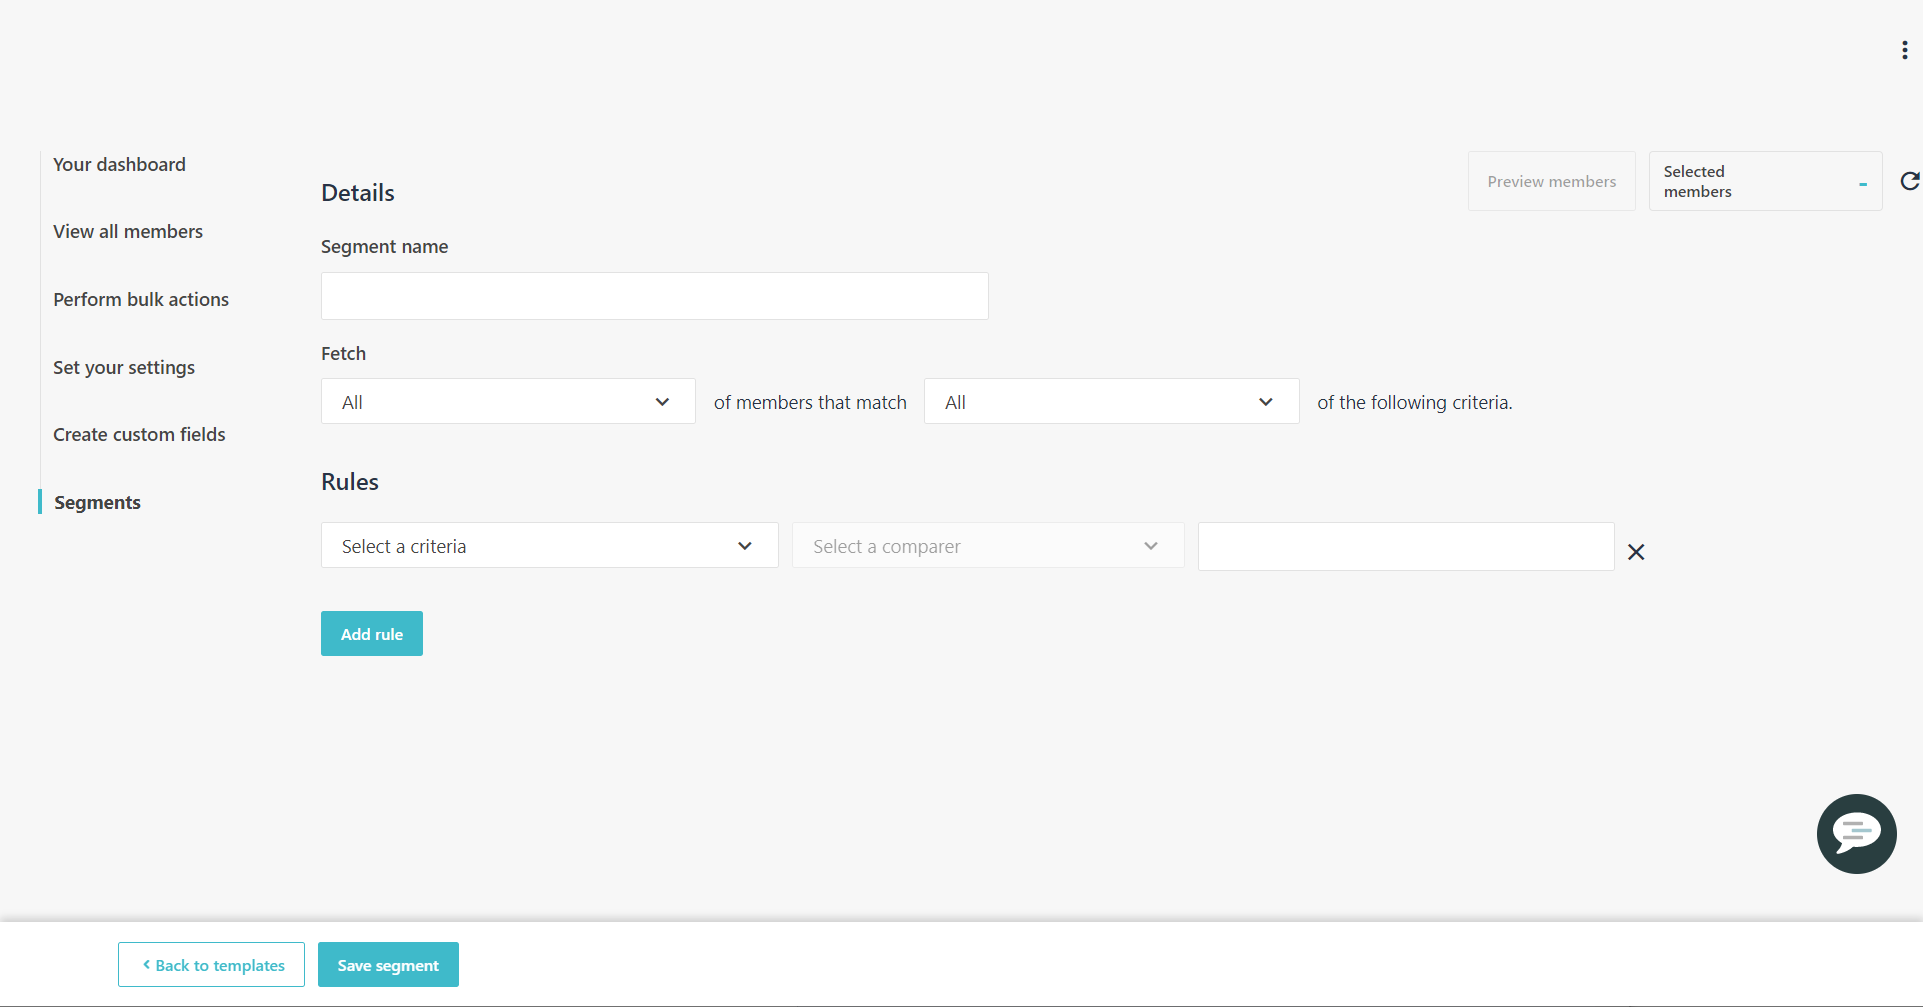
On the Details page, in the Segment name field, enter a name.

In the Fetch field, in the first drop-down list, click one of the following options to retrieve recipients from your email list:
All - fetches all the matching recipients.
Max number - fetches a maximum number of recipients.
Max % - fetches a maximum percentage of recipients.
In the second drop-down list, click one of the following to retrieve recipients that match your segment rules:
All - fetches recipients that match all the segment rules. Rules are combined with an AND operation.
Any - fetches recipients that match any of the segment rules. Rules are combined with an OR operation.
To add a rule, in the Rules field, define your rule by selecting items in the three drop-down lists:
In the first drop-down list, select the type of criteria to specify how you want to narrow down your target audience. For example, by Member Name, Member Email, Date Added, and so on.
Note
If you have audience discovery enabled, you can select audience discovery tags as criteria. These are located at the bottom of the drop-down list, under default fields and custom fields.
In the second drop-down list, select the criteria method to determine what it should do. For example, is not, is before, is after, contains, does not contain, and so on.
In the third drop-down list, select the actual rule to process. The options depend on the choices you made in the two previous drop-down lists.
For example, to find the recipients who have not opened a specific campaign: In the first drop-down list click Specific campaign opened, in the second drop-down list click is not, and in the third drop-down click the campaign.
In the top-right corner, in the Selected members field, you can view the number of recipients that match the segment. You can also click Preview members, to preview the matching recipients.
(Optional) To add more rules to your segment, click Add rule. You can combine different rules to narrow down the list of recipients contained in the segment.
Click Save segment.
Save a segment as a template
You might want to reuse segments.
To save a segment as a template:
On the menu bar, click Audience > Segments.
Click the name of the segment you want to save as a template.
In the top right corner, click
 and click Save as a template.
Enter a name and a description and click Save template.
Find the segment ID
The segment ID is a unique identifier for your segment. You can use it in API calls related to segments or when reporting issues.
To find the segment ID:
On the menu bar, click Audience > Segments.
Find the segment you want to get the ID of.
In the Segment ID column, copy the ID.
Copy a segment into a different mailing list
Your email list serves as both the source of the recipients of your email marketing campaigns and as a repository of information. You might find it convenient to add an indicative segment of one of your email lists to another one.
To copy a segment into a different mailing list:
On the menu bar, click Audience > Segments.
Click the name of the segment you want to copy.
In the top right corner, click
 , and click one of the following:
Copy segment to another list - copies the entire segment, including all its criteria.
Copy members to another list - copies the members that are calculated by the segment itself.
Export a segment
Your email list serves as both the source of the recipients of your email marketing campaigns and as a repository of information. This is why you might need to have an indicative segment of your list of subscribers exported as a CSV or an Excel file to use outside our platform.
To export a segment:
On the menu bar, click Audience > Segments.
Click the name of the segment you want to copy.
In the top right corner, click
 , and click Export to CSV or Export to Excel.
View preferences segment
For every option you add to the preferences field, a separate segment is automatically created and will be named by default as Preference is 'Option name'.
Example: Preference is 'Weekly Newsletter'.
To view preferences segment:
On the menu bar, click Audience > Segments.
Click Preferences.
In the top-right corner in the Selected members field, you can view the number of recipients that match the segment.
You can also click Preview members, to preview the matching recipients.
You cannot edit or add rules.
Note
If you rename an option in the preferences field, a new segment is automatically created. The previous one remains intact and displayed as before.
If you delete an option in the preferences field, it won't affect the respective segment.