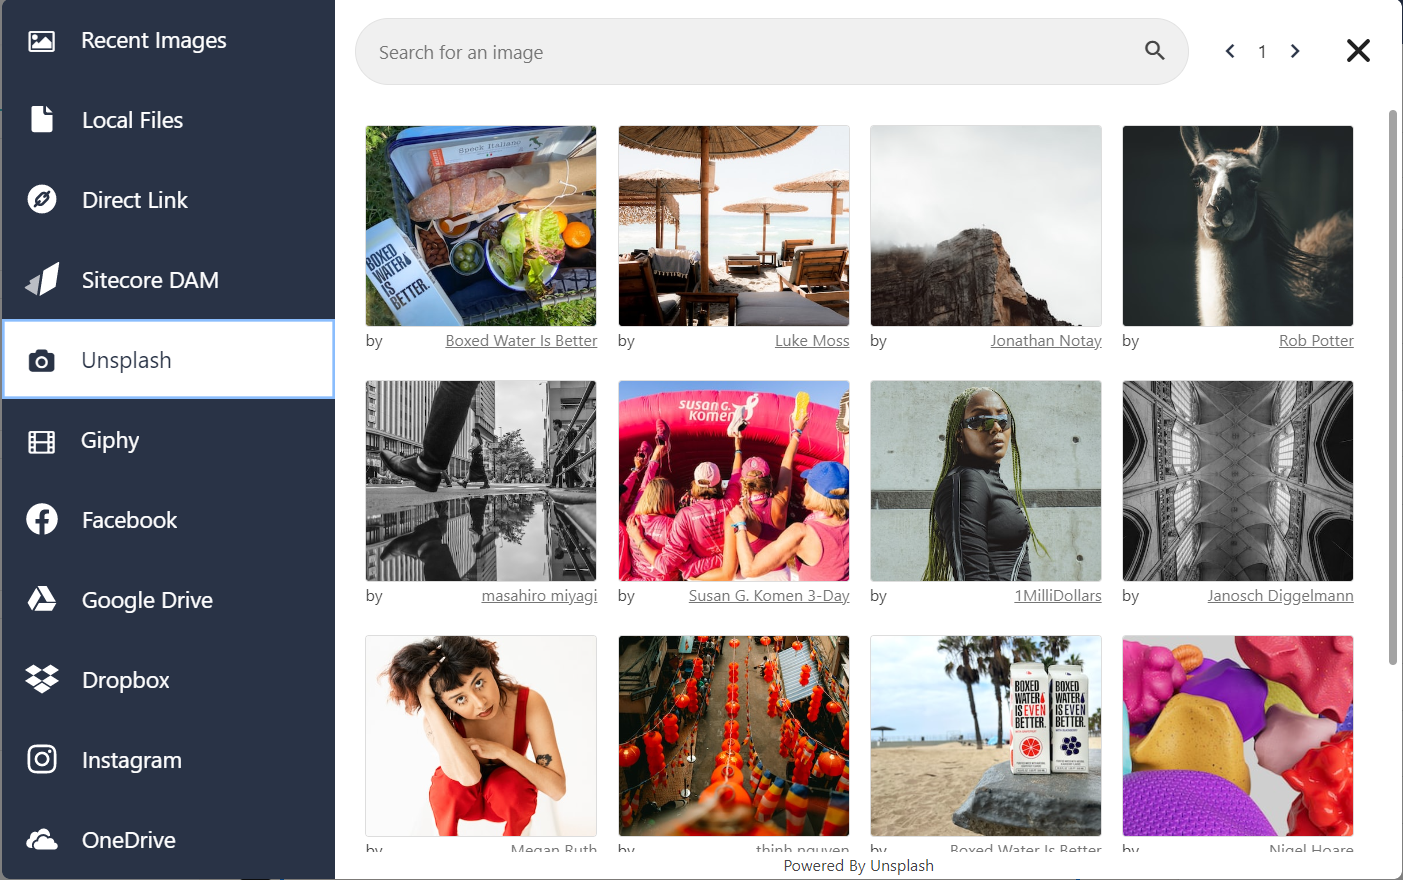
Use the image picker
Learn how to use the image picker.
You use the image picker to add or change the image of an image item or the background image in your newsletter, landing page, or subscription form template, or when you add a featured image to your Gmail annotation.
To use the image picker:
From your image item or settings, open the image picker.

You have the following options:
To upload an image from your recently used images, click Recent Images.
To upload an image from your computer, click Local Files.
To use an image from the internet, click Direct Link.
To upload an image from Sitecore Content Hub digital asset management system, click Sitecore DAM - see Upload an image from Content Hub DAM.
To upload an image from an application, click Unsplash or Giphy.
To upload an image from social media, click Facebook or Instagram.
To upload an image from your file share, click OneDrive, Dropbox, or Google Drive.
Upload an image from Content Hub DAM
To upload an image from Sitecore Content Hub digital asset management system:
From your image item or newsletter settings, open the image picker.
Click Sitecore DAM.
To log in to Sitecore DAM, enter your Content Hub domain, your user name, and password and click Log in. Only images that are approved in Sitecore Content Hub are displayed.
To find an image, use the search field or filter by file type.
Alternatively, to find an image, click Advanced and filter by title, file name, or created date, then select a comparer, enter a text or a value, and click Add filter.
Note
The filters you apply are added as a label at the top of the page. To remove a filter, click remove
 on the label.
Click the image you want to use in your campaign, then click Add.
To log out of Content Hub DAM, click Log out.