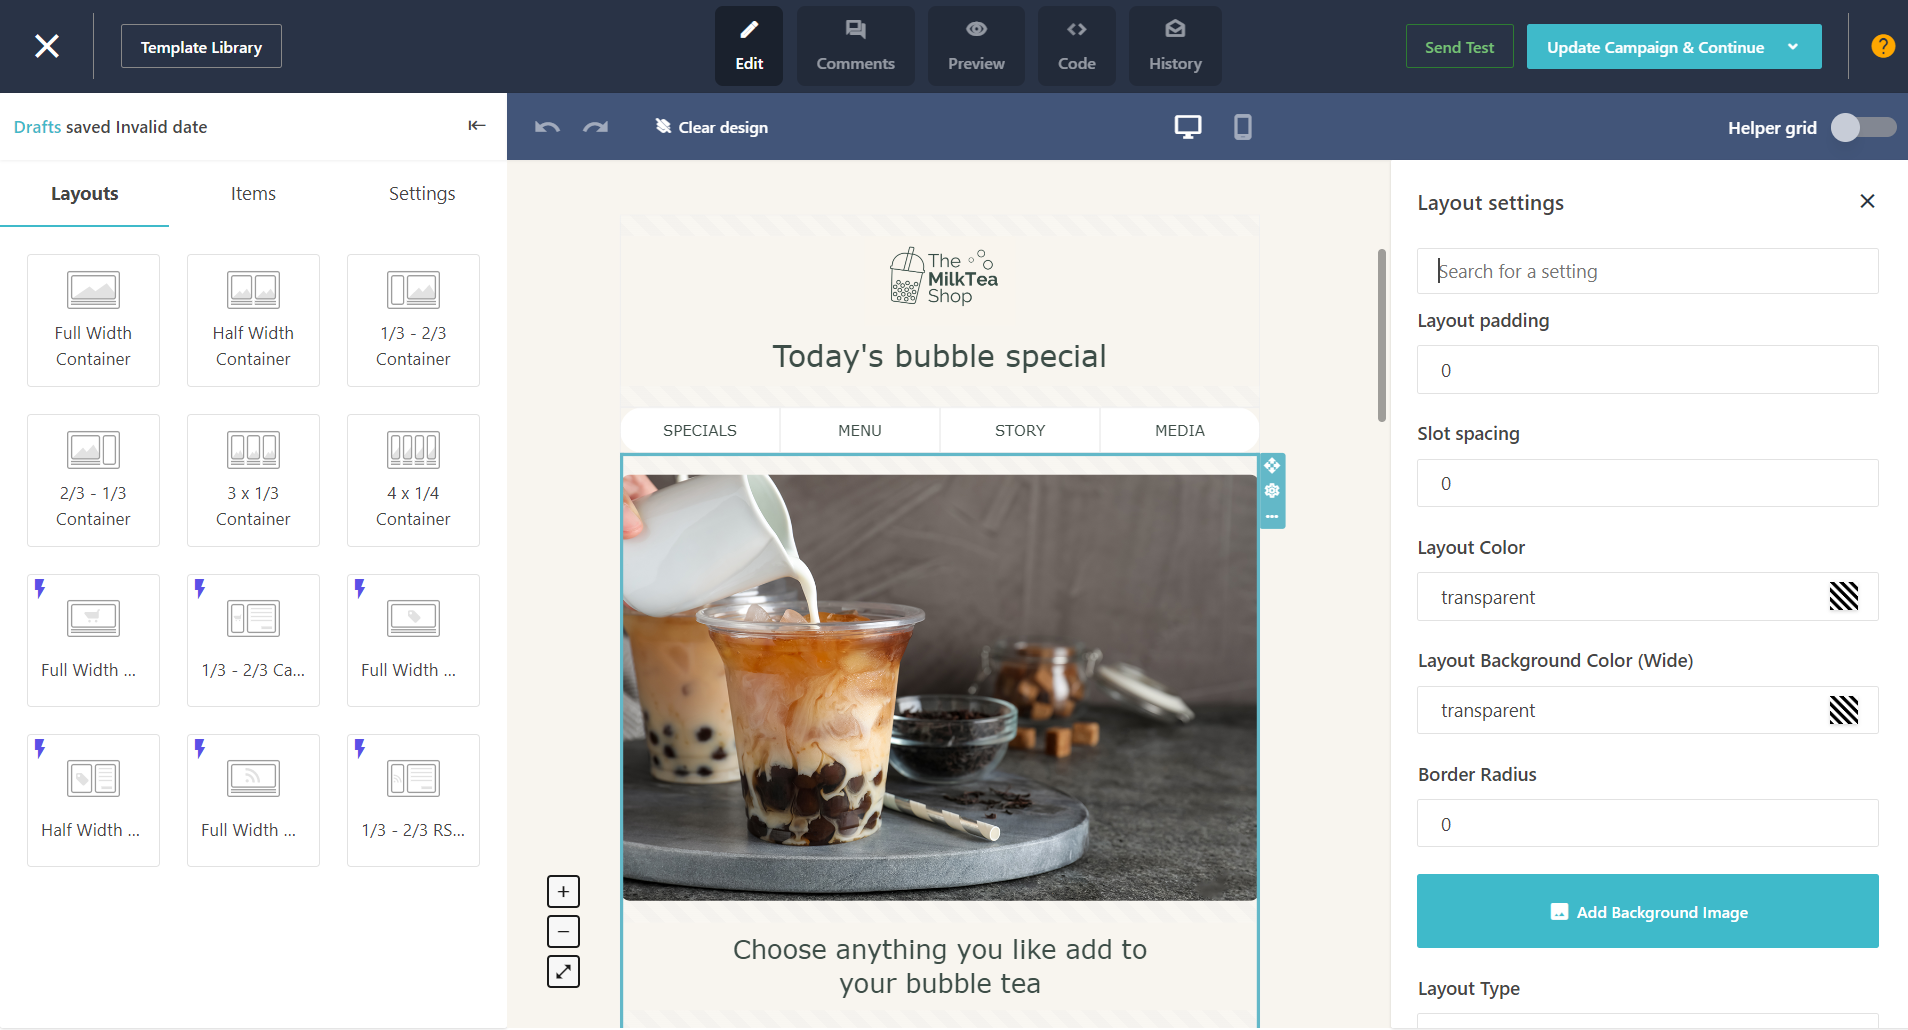
Working with the campaign editor
Overview of the campaign editor and its main sections.
The campaign editor allows you to easily add or edit the layout and items of your newsletters. The editor consists of four main sections: the top menu, the left pane, the editing area, and the right pane.

Top menu
When building your newsletters, you can switch between the different modes in the top menu and use the available options. The top menu is always visible whichever mode you are in.
The following table lists the modes and other available buttons in the top menu:
Name | Description |
|---|---|
Edit | Default mode when you open the editor. The edit mode allows you to edit and customize the structures and items in your newsletter. |
Comments | Comments mode allows you to add comments to a newsletter design and collaborate with team members. |
Preview | Preview mode allows you to see what your newsletter looks like on mobile devices, tablets, or desktops. |
Code | Code mode gives a read-only view of the HTML code of your newsletter. You can also copy the HTML code or download and upload JSON files. |
History | History mode opens a pane with a list of saved drafts of your newsletters. You can select a draft and load it to revert your newsletter to that version. |
Close | Closes and autosaves the current newsletter and exits the editor. |
Template Library | Opens the newsletter template library from the editor. |
Send Test | Sends a test email newsletter to email addresses of your choice to check your newsletter in an email client. |
Update Campaign & Continue | Allows you to sync the current design at the campaign level and exit the editor. There are two extra buttons when you hover over the “Update Campaign & Continue” button. You have two options:
|
Draft status | Indicates when your design was last saved either automatically or manually. The editor autosaves drafts every 30 seconds. |
Hide/Unhide | Allows you to hide or display the left pane at any time. Hiding it increases your workspace for editing your campaign. |
| Undo. Allows you to undo changes you have made to your newsletter design. |
| Redo. Allows you to redo changes to your newsletter design which you have previously undone. |
| Desktop newsletter. The default view of the editor. Allows you to edit the desktop version of your newsletter. |
| Mobile newsletter. Allows you to edit the mobile version of your newsletter, without affecting the desktop version. |
Clear design | Clears the design of your newsletter and reverts to an empty template so you can start from scratch. |
Helper grid | When switched on, the editing area shows what layout and items you can add to your design. |
Left pane
By default, the left pane is displayed in the campaign editor. It consists of three separate tabs: Layout, Items, and Settings. You can use the left pane to switch between the tabs to create a layout, add items, or customize the general settings of your newsletters.
Editing area
The editing area is the main workspace in the campaign editor where you can edit and customize the layouts and items in your newsletter, preview your newsletter on different devices, or add comments for collaboration.
Right pane
The right pane is displayed in the campaign editor when you click an item or a layout in the editing area. This pane contains the settings you can use to customize an item or a layout. You can close the right pane at any time by clicking  . This can be useful when you need to increase your workspace to edit your newsletter.


